Campaign Manager - Campaign Manager (Silverlight)
Parametric GroupsUse the Parametric Group tool to create columns whose values are based on queries. The query results are saved in ‘bins’, which are essentially groups of records that share common criteria as specified in the source query. Groups are not necessarily mutually exclusive, which means that individual records may exist in more than one bin. For example, create columns at the customer level that summarize shopping behavior based on information in the foreign ‘Order’ table. In this example the bins could be things like “Shops Online”, “Shops instore”, or “Catalogue Shopper”. Customers who make purchases in more than one way will exist in multiple bins. Procedure
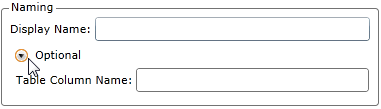
In the Table Column Name field, enter the name you want to use to display the column in the Data Explorer tab.
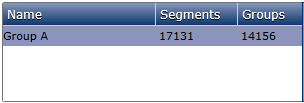
With a group selected, drag segments from the Data Explorer into the area on the right. You can add multiple segment parameters using the available join operators. Where your segment query contains elements from different tables, then the order that you add the elements is important. The segment resolution will be set by the first column that you drag in. The entire segment will be resolved at this level, before being resolved to the specified Target Table (if it is different). For example, in the following segment, the first query element is Gender = Female from the Customer table. The second query element is Product Code = 'LIOG3' from the Order table. The segment count will therefore be female customers who have ordered the product 'LIOG3' i.e. 14,156
In this example, the query elements are reversed with the resolution being set by Product Code = 'LIOG3'. The segment is therefore a count of orders of the product 'LIOG3' made by females. Where a female had ordered 'LIOG3' more than once then each order would be counted separately, which explains why the segment count is higher than the first example i.e. 17,131.
The group display on the left will display two counts, a Segment count and a Group count. These counts will be different where the segment resolution is different to the group resolution as set by the Target Table field.
|


| Online & Instructor-Led Courses | Training Videos | Webinar Recordings | ||

|
© Alterian. All Rights Reserved. | Privacy Policy | Legal Notice |   |