Campaign Manager - Campaign Manager (Silverlight)
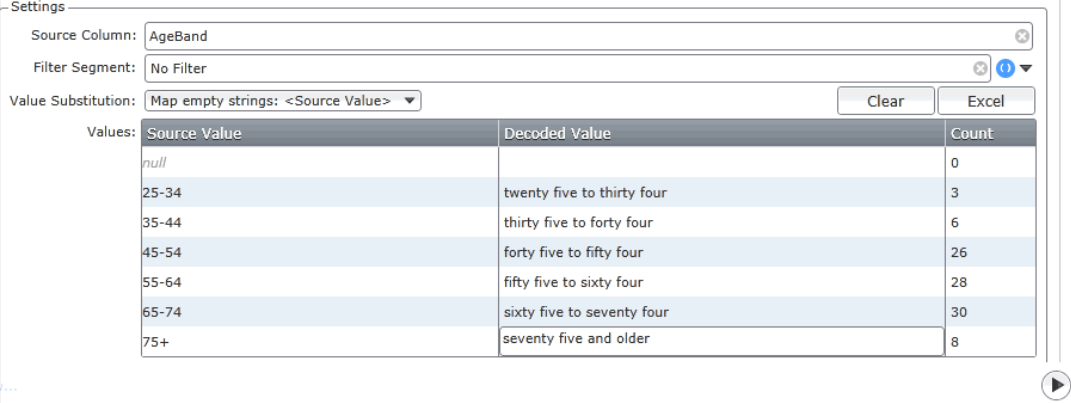

Decode

Use the Decode tool to make the names of tables and fields more meaningful by adding descriptive labels to encoded column data. You can also assign a value to nulls, correct mistakes in labels, and add filters to existing columns to create new subsets of records.

It effectively works by copying the original Column and creating a new one with the specified amendments. If you make this column permanent, it will be visible and available in the Data Explorer just like any other column.

Note: Although you may create decodes in Engine on columns with up to 256,000 discrete values, with this tool you are only able to create decodes on columns with less than 16,200 discrete values.

Procedure

  1. Drag the Decode tool to the Workspace.
  2. Choose the join operator.
  3. Click the icon to the right of the New Decode field, a new window opens.
  4. In the Display Name field, enter a name for the decode column.

If you save the tool as a template, this name will be used to display it in the Templates tab. The Display Name is also used in the Caption area if you insert the tool into a document.

  1. If you want the new column to be automatically indexed, select the Index Column check box. You should only index columns when necessary. For example, when engineered columns have > 250 discrete values, indexing can start to improve query performance.
Note: The default value for the Index Column check box is unselected. If you import a Campaign Manager document with the Index Column check box selected, the check box will revert to unselected. This is because when you import an existing engineering node, you are effectively creating a new one and the check box default of unselected is applied.
  1. Optional setting: if you want to make the column permanent so that it can be viewed and selected in the Data Explorer, click the Optional expand icon. In the Table Column Name field, enter the name you want to use to display the column in the Data Explorer tab.
  2. Populate the remaining Settings fields:
  • Source Column: Select a column that will provide the basis of the decoded column. An editable grid will be displayed below which displays the values from the selected source column on the left, with a 'New Value' column where you can provide an alternate value.
  • Filter Segment: Use this field to apply filters to the original column to create a subset of records. Filters can be used in conjunction with the column editing functionality to create decodes that are significantly different from the source column.
  • Mapped Values: Once a source Column has been selected, a grid is displayed where you can edit field names – providing descriptive names that users will be familiar with. Click into the New Value field and type a new field description.

  • Value Substitution: Use this option to specify the value of fields which have not been mapped:
    • <Source Value>: Unmapped fields will retain the field description of the source field.
    • <Enter Value>: Unmapped fields will be labelled with the specified label.
  • Excel: Use this option to open a dialogue box, which allows you to select an Excel or XML file to import data that will update/override the existing Source Values and/or Decoded Values.
Note:

For an Excel Spreadsheet to be uploaded using the Decode Tool, the spreadsheet must be called 'Sheet 1' and must contain two columns with the following headers:

  • NEWVALUE
  • SOURCEVALUE
  Online & Instructor-Led Courses | Training Videos | Webinar Recordings
© Alterian. All Rights Reserved. | Privacy Policy | Legal Notice