Campaign Manager - Campaign Manager (Silverlight)
Document SchedulingYou can schedule all segment documents for processing using the Schedule options in the Document Information window. The options enable you to specify the date and time at which you want the segment document to be processed, and to recur at specified intervals. This functionality would typically be used in conjunction with export tools like Export to File, Export Grids to Excel, and Export to File so that you can effectively batch process the output of segment document to the Document Store, FTP server, or to database file at a convenient time. For example, you might want to schedule this for the early hours of the morning when it is unlikely that there will be users logged into the system. Procedure
The document scheduler window is displayed.
Checking this means that if the documents contains reports, for example a crosstabulation grid, that are used elsewhere, for example on a dashboard, the reports update with the result of the saved document. These documents can be scheduled to run, using the information above, immediately after the dataload, meaning that users will not have to recalculate the dashboard to see the updated results.
The specified schedule is applied and calendar icon is displayed in the document title bar, which you can hover the mouse over to view the schedule details. When the document is saved, a
|
 at the top of the segment document to display the Document Info window.
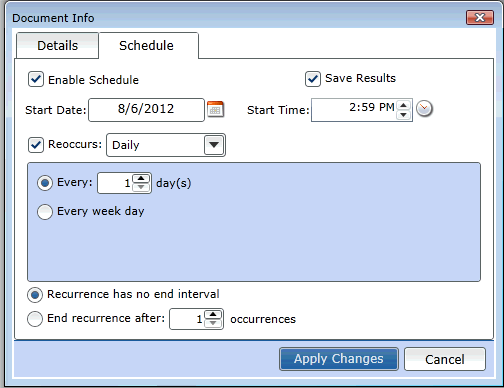
 icon will be displayed in the
 icon in the top right corner of the
| Online & Instructor-Led Courses | Training Videos | Webinar Recordings | ||

|
© Alterian. All Rights Reserved. | Privacy Policy | Legal Notice |   |