Campaign Manager - Campaign Manager (Silverlight)
Data Import ToolUse the Data Import tool to import data into the Engine database connected to the Campaign Manager system. It should be considered an ancillary method as the most powerful and efficient method of importing data into Engine is using the iLoader product. Before you beginBefore importing into the Engine database using this tool, the file must first be uploaded into the Campaign Manager document store. Fixed width, delimited, and Excel files are supported. The Data Import tool is considered an ancillary method for importing data. It is recommended to import data into Engine using iLoader. Procedure
The Document Explorer is displayed.
The Upload Files window is displayed.
The selected file is displayed in the Upload Files window.
A File Transfers progress window is displayed. Once the upload is complete, the file is displayed in the Document Explorer window. If you cannot see the file, ensure that 'All Files' is selected from the drop-down menu on the bottom-right of the screen.
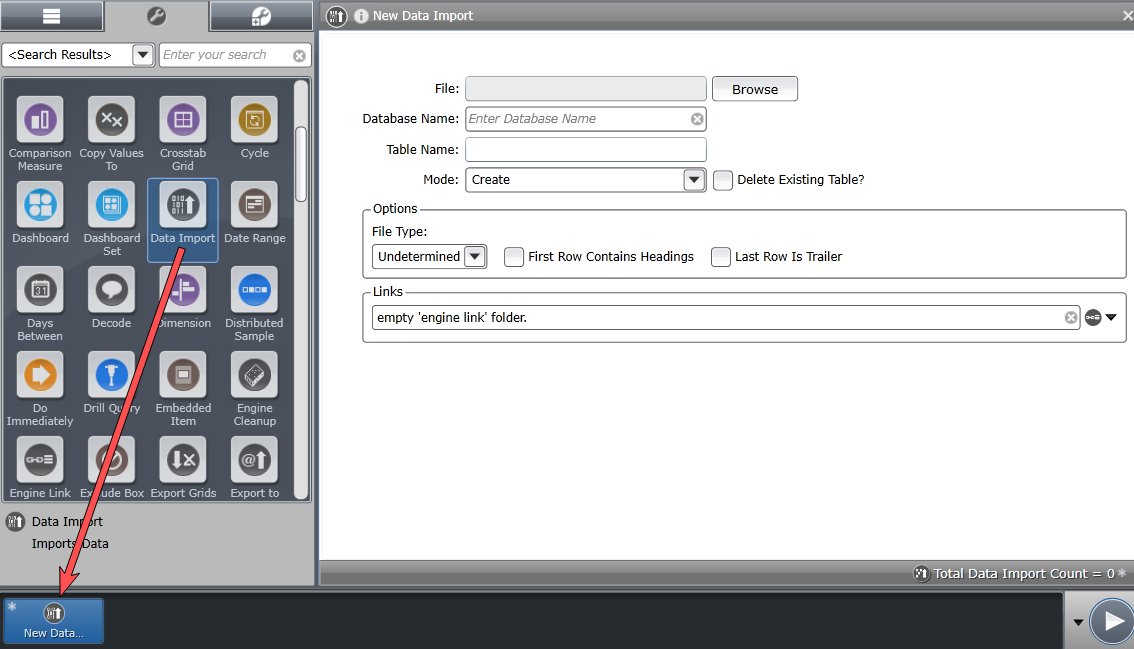
Complete the Options section by selecting the File Type and the corresponding options which will differ depending on the type of file. For example, for a 'Delimited' file the fields will be Delimiter, Qualifier and whether the imported file includes Header and Trailer records. The grid below displays a list of all the columns in the selected file. Using the buttons you can add a new column, delete a column, or change the order of columns.
When creating a new table, you must click into the Links area below to map table keys using the Engine Link tool. If you selected the Append mode to append to an existing table, the Links field is not required and is no longer displayed.
|

| Online & Instructor-Led Courses | Training Videos | Webinar Recordings | ||

|
© Alterian. All Rights Reserved. | Privacy Policy | Legal Notice |   |